Lab 3 — Communicate something with Haply
This lab was performed individually.
The objective of this lab was to communicate three high-level words using only grounded force-feedback from the Haply, i.e., no audio/graphics. Then we were to test our sketches with others to check if they were able to relate to our representative words.
Code Structure
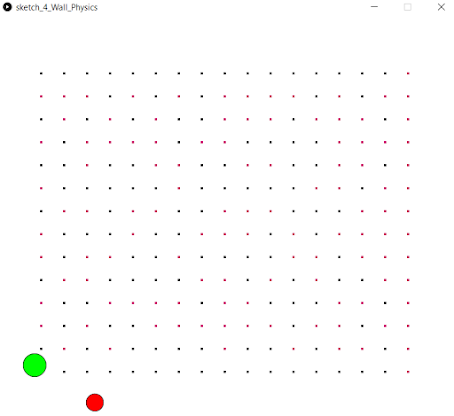
Once I thought of a potential word, I used whatever existing sketch I had (from the examples or my previous lab/project work) as a base that I felt would most easily allow me to implement the word representation. Once I was happy with all three representations, I merged them into a single sketch and used a mode-based structure where pressing “1”, “2”, or “3” on the keyboard would switch between each representation. The participant was only able to see the screen below during testing, regardless of mode. For the sake of clarity and context, however, the visuals are shown in this blog post.

Word 1: Rugged
Being fairly new to haptics, I wasn’t sure how to start; conveying an intended meaning with *only* grounded force-feedback is obviously a challenge. My initial approach was to experiment with creating several combinations of fisica library objects and force-feedback effects, think about what I had felt, and reiterate from there until I felt satisfied with a possible representation. That seemed like a lot of work, so naturally I used my work from the previous labs and project as a starting point. The “point grid” I created in lab 2 for the maze using a 2-D FBox array had a very “bumpy” texture to it when the points were large enough to hinder but not block the movement of the Haply. This gave me the idea to incorporate a vibrational effect to the sketch to create the sensation of a rugged/rough terrain texture. A vibration sensation was added by inducing small, random forces with the fEE.x or fEE.y commands. This was simple enough to create and what I believed would be an easy first word for participants to guess. I had also thought of a “pinball” type effect, where the end-effector would “bounce” off points, but that seemed complex to design and refine, especially given the time constraints. Maybe for another day.

Word 2: Pressure
The second word occurred to me while I was hopping through the packaged Haply example sketches to look for ideas. The maze example contained a shallow pool of water and that gave me the idea to implement the sensation of hydrostatic pressure in a deep body of water; imagine the end-effector as a submarine diving down the Mariana Trench. The further down you go, the greater is the pressure acting on you. Additionally, temperatures are lower at the bottom. This results in a slightly higher density of water making it somewhat more difficult to move through. Based on my experience, I felt that this could easily be represented via damping as a function of the Haply’s vertical position. Here, the body of water is represented by an FBox covering a significant portion of the sketch window.
To find values for the position, I used the naïve debugging method of printing the Haply’s position (posEE.x and posEE.y) to the screen. I then generated a linear equation based on a few points, arbitrary chosen based on feel and trial and error.

//Y and C represent the gradient and intercept of the equationmode2_damping = round(k * posEE.y + c);
s.h_avatar.setDamping(mode2_damping);
A well-engineered submarine is able to withstand these high pressures. Our end-effector, however, is a poor submarine. As you dive down, you start to feel pressure acting on the hull that gradually increases with depth. This is represented via vibrations by randomizing the fEE.x and fEE.y values when the end-effector is in contact with the body of water. The frequency with which these vibrations occur is meant to simulate the magnitude of pressure and is, again, a function of the Haply’s vertical position. With an extremely high pressure and thus more vibratory motion at the bottom of the plate, the user can release the end-effector to sometimes destabilize the Haply. This would represent the submarine imploding.
The code below handles the vibrations. The durations are based on the y-pos thresholds crossed (using arbitrary values chosen values based on feel).
int mode2_index;
int[] mode2_thresholds = { 6, 7, 9, 11, 14, 16, 19 };
int[] mode2_durations = { 60, 50, 40, 30, 20, 16, 12};
float mode2_tLastChange = Float.NEGATIVE_INFINITY;for (int i = mode2_thresholds.length - 1; i >=0; i--)
{
   if (posEE.y > mode2_thresholds[i] && mode2_index != mode2_thresholds[i])
      mode2_index = mode2_thresholds[i];
}if (millis() - mode2_tLastChange > mode2_durations[mode2_index])
{
   fEE.x = random(-5, 5);
   fEE.y = random(-1, 1);
   mode2_tLastChange = millis();
}
…
Of course, I didn’t believe anyone testing the sketch, even a haptic “expert”, would have guessed this metaphor. It’s too specific! After testing my own sketch, I did feel as though “slingy” was another possibility, since pulling the end-effector as low as possible would sometimes result in it bouncing back up. I believed a more likely response would involve a high arousal word; while I was expecting something like “agitation” or “excited”, I was more curious to know if the participants could relate to the pressure analogy after I had explained it to them. This would, of course, require them to have a very basic understanding of fluid mechanics. I was fortunate that my participant had a degree in engineering. :)
Word 3: Tick Tock 🕒
Lastly, I wanted to incorporate the Haply’s motion guidance mechanism for my last communicative movement. I used my PID lab’s modified code to generate a staircase-path that endlessly went up and down, as I felt that it would be an easy pattern to both design and guess. Unfortunately, I wasn’t satisfied with the resulting motion; I was able to generate a nice-looking staircase path visually, but the end-effector wouldn’t track it as smoothly, regardless of the PID tuning or speed with which the movement occurred. Ultimately, I ditched the code and decided to work on “point-based” navigation, in which the Haply moves sequentially through a series of points, spending a second at each point. This was done by setting up a position vector array with the desired points, and then generating and applying the force vector to the Haply (F(t) = kX(t)).
PVector[] mode3_locations = {
 new PVector(-0.055, 0.0323),
 new PVector(-0.022, 0.0724),
 new PVector(0.0184, 0.0810),
 ...
};int mode3_index;
float mode3_tDuration = 1000;
float mode3_tLastChange = Float.NEGATIVE_INFINITY;// every X ms interval ...
if (millis() - mode3_tLastChange > mode3_tDuration)
{
   //cycle back to 0 after going through last point
   if (mode3_index == mode3_locations.length - 1)
      mode3_index = -1;
   mode3_index++;

   mode3_tLastChange = millis();   PVector xDiff = (posEE.copy()).sub(mode3_locations[mode3_index]);
   force.set(xDiff.mult(-400));
   fEE.set(graphics_to_device(force));
}
The movement appeared to be less unstable and I was fascinated by the possibilities here due to the ease with which I could generate a path. I tried a variety of random paths with the intent to convey a mechanical or industrial robotic movement feel, some of which including a quick back and forth motion, and various 2-D paths (think of something like an industrial robot end-effector moving boxes or putting caps on bottles). However, that seemed too specific and I realized a simple mechanism like a clock ticking would be more familiar to most people, so I decided to go with a pendulum-like guidance motion using 5 points: 2 on each side and a “mean” position, with a 1 second period before moving to the next point. I included a sharp vibration effect just before each motion to simulate a “tick” feel. Of the 1 second period before which the Haply moves to another point, a vibrational “pulse” is induced in the last 40 ms; the effect seemed perceptible. This was done using the same fEE.x randomization technique.
float mode3_tDuration = 1000; // ms
float mode3_tVib = 40; // ms, how long to vibrate the Haply before moving to next point...
else if (millis() — mode3_tLastChange > mode3_tDuration — mode3_tVib)
    fEE.x = random(-10, 10);

I was happy with the end result, even though it’s obviously far from an elegant pendulum-like motion that could be generated with harmonic motion equations. Could an actual clock with 60 ticks be simulated? Possibly, but I believe the full clockwise movement would mean using a narrower space on the Haply’s plate. Still, it’s an interesting idea that might be worth exploring.
Results & Reflection
I was only able to test my sketch with one participant, who came up with these words for each respective representation:
- Bumpy/Rough
- Static, buzzing
- Guided
As expected, the first word was simple enough to be “correctly” guessed. The static and buzzing for word 2 mostly likely resulted from the sensation of vibrations as the participant moved the end-effector around the plate. Interestingly, they were able to relate to the pressure analogy once I had described my intended representation to them; we both noted how important context is when conveying these representations and how “specific” representations are better understood with supporting visuals or audio. The participant noted this with their own lab 3 experiment as well. “Guided” is again a perfectly reasonable interpretation of word 3, but I failed to convey the intended clockwork movement. Admittedly, this one too would’ve been difficult without context. I would’ve enjoyed testing this sketch with several others to gather more representative interpretations (including testing with those unfamiliar with force-feedback haptics); alas, this is just one of the many problems with haptic studies!
I enjoyed working on each implementation but only once I had a good idea of what I wanted to represent; the brainstorming was mostly done mentally and I resorted to a lot of thinking and experimentation to decide on these words. Just like with the previous labs, I learned quite a bit here. Specifically, discovering an easier way to navigate from point-to-point using a position vector array instead of sticking to the “PID-style” continuous point-tracking as I did with the square path tracking I coded in lab 4. I also realized I could simulate vibrations by inducing random fEE.x and fEE.y values; I found this expressive enough that I incorporated it in every word representation! A project member told me about this “trick” as a way for participants to feel vibrations without requiring the vibrotactile actuators (albeit not to same degree of expressivity!) we used for our haptic data visualization project. This made me realize that for how relatively cheap the Haply is, it can cleverly be used to convey a variety of effects, especially when used multi-modally with audio and/or visuals.
Find the code here! Please read the instructions at the top of the screen in the sketch.
Thanks to a fellow classmate, Sri G., for testing!